Nestled among the expansive and wild landscapes of southern Utah lies the small but mighty Arches National Park. It’s hard to believe how much there is to see here within just a relatively compact area (at least in compared to other National Parks in the US)!
The size of Arches National Park might pale in comparison to some of its neighbors in Utah, but she still packs a punch. Across just 76,518 acres, the park is home to over 2,000 natural arches, making it the largest concentration of stone arches in the world!

There are new surprises around every corner and although the hikes are relatively short, each one has its own special flair. From painted canyons to stunning red rock cliffs, Arches National Park is a MUST, and definitely one of the most awe-inspiring parks in the US in my opinion.
In 2021 I visited for a second time to take on even more of the best hikes in Arches National Park and I was only further blown away by the amazing formations, colors, and sheer size of the epic arches that are the park’s namesake.
That being said, it can be a bit confusing trying to pick and choose what to see and where to go since there are so many similarities in geology you’ll witness on each hike. Thankfully, all it takes is a little research and planning.
In this post, I’m highlighting the best hikes Arches National Park has to offer, along with what to expect from each. I hope this post inspires you to grab your hiking shoes, a camera and get out there to start exploring this geologic wonder of Utah asap.
Tips for Visiting Arches National Park

Heads up! Arches recently announced some big changes in how you will need to access the park in 2022. In order to better manage the intense traffic during the busy season, they’ve implemented a timed entry system that should hopefully improve visitor experiences.
Accessing the Park Between April and October
To access the park, you’ll have to reserve a timed-entry ticket if you plan on visiting between April 3rd and October 3rd. This does not apply to those that already have camping, backcountry or special use permits.
After registering for an account and plugging in all of your info, simply choose your desired date and times for entry. You will still need to either pay an entrance fee or purchase a parks pass.
What does this mean for you? Well, unlike in past years you may want to plan your trip a bit further in advance to ensure you can secure a ticket on your desired dates as spots are limited.
Accessing the Park Between October and March
If you choose to visit from October to March you won’t need to reserve a timed-entry ticket, however know that it is more of a free-for-all, and you may encounter long wait times and packed parking lots. Planning ahead can really help to cut back on annoying delays.
For example, since most trailhead parking lots fill up before 9 AM, it’s best to try to get there as early as possible to beat the crowds. If you don’t, you might run into restricted access until congestion tapers off.
Hiking Tips for Arches National Park
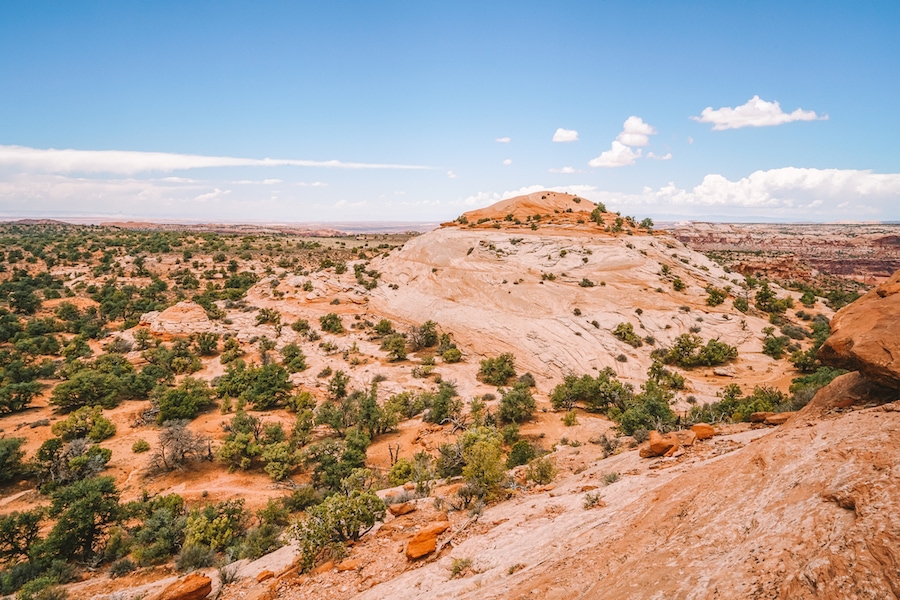
- Bring tons of water! I can’t emphasize this enough. Arches National Park is a desert climate with very little shade, so you will need lots of water during your visit. I recommend bringing around a gallon per person per day with you. There are a couple water refill stations available (one at the visitor center and Devils Garden trailhead) but that’s it…so be sure to prepare when venturing away from those areas.
- Sunscreen and hats are a must! Sunshine is abundant here and there is barely any shade, so don’t skimp on the sunscreen. Also, a hat will be your saving grace.
- If traveling to the park in the summer, plan to hike early in the morning or at sunset to avoid the heat. It can reach upwards of 100 degrees in the peak summer months. Plus, a few photos at golden hour never hurt anybody!
- As with traveling to any National Park, it is important to Leave No Trace. Read up on the seven principles behind Leave No Trace before traveling to Arches National park or any park for that matter to make sure you’re not leaving a negative impact on these delicate natural areas.
- It is important to stay on the trails within Arches National Park in order to protect the natural habitat and fend off early erosion as well as keep yourself safe! These rock formations are always evolving, so be safe by sticking to the trails and protect the environment by leaving everything as it is.
- Small but popular, Arches National Park has become one of the most crowded parks in the US. I recommend booking accommodation in advance and getting an early start on the day to avoid large crowds.
Read more National Park posts
Best Things to do in Yosemite
Sequoia National Park in Winter
Where to Stay in Yosemite
The Absolute Best Hikes To Do In Arches National Park
Delicate Arch Trail

Difficulty Level: Moderate
Hiking Distance: 3 miles round trip
Elevation Gain: 600 feet
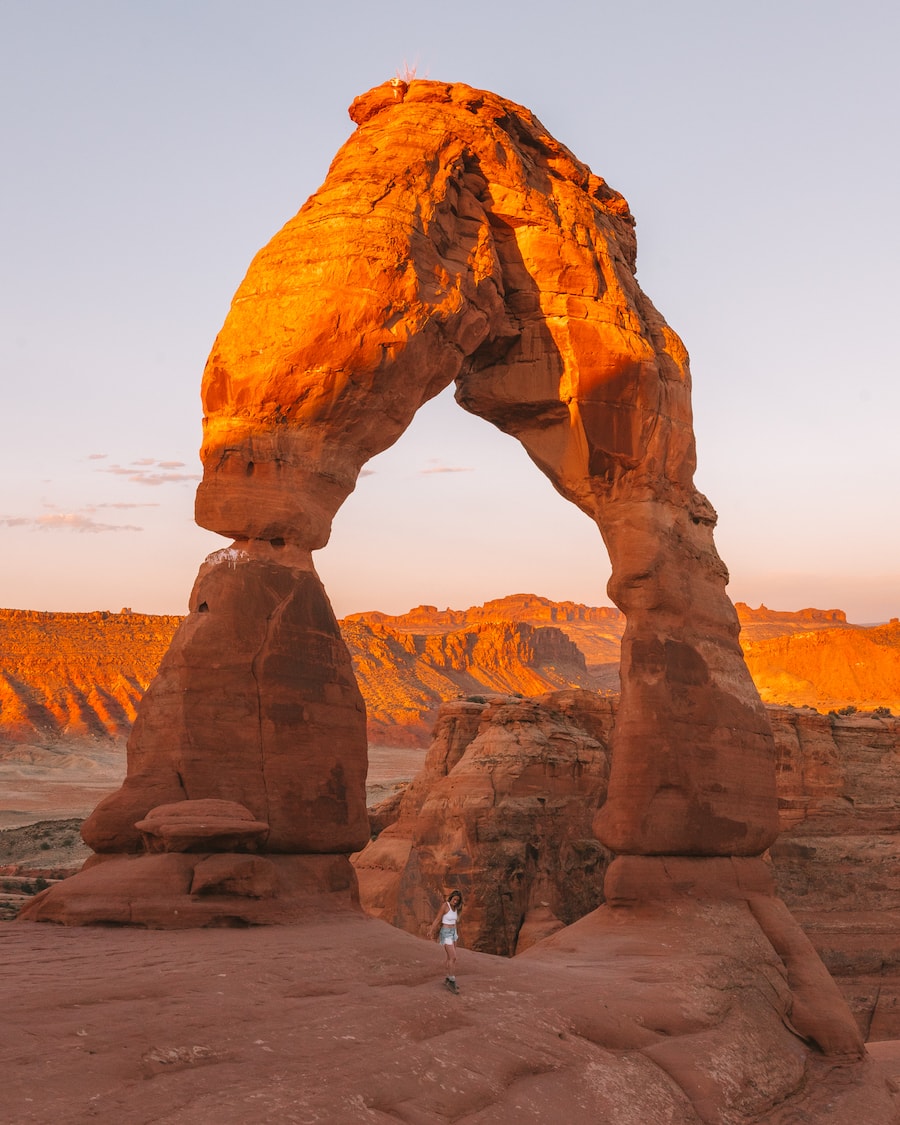
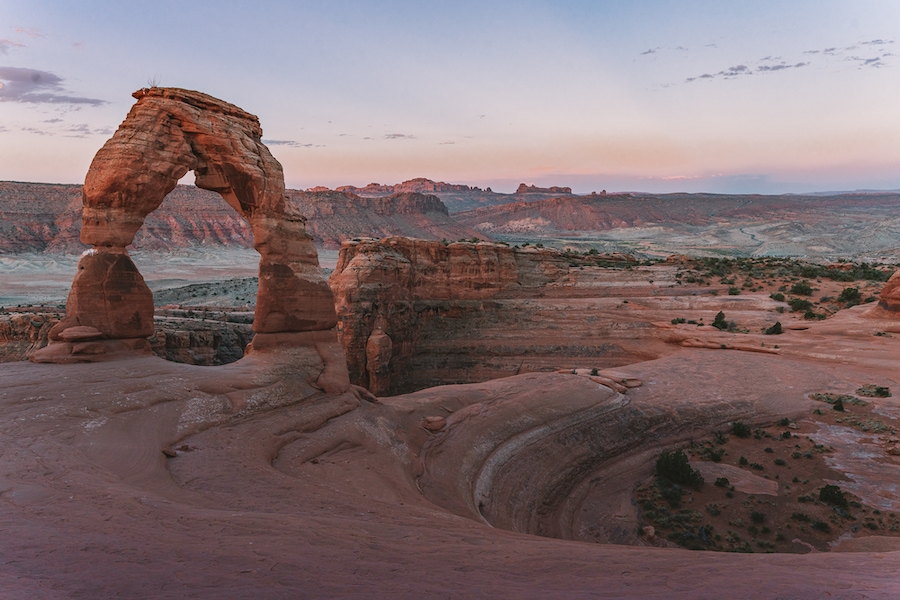
Delicate Arch is hands down the most popular hike in the park. Look familiar? You might recognize it from the Utah license plate or the plethora of Instagram shots taken here.
It’s popular for good reason, and the hike itself is not too long but has enough twists, turns and elevation changes to keep it interesting.
Plus, the 480-foot arch at the finale is truly impressive. Starting early is a MUST on this one to avoid crowds and beat the heat as there is no shade.
When we last did this hike, we started about an hour before sunrise and that was a beautiful time to see the sun come up as we reached the arch and avoid the crowds. After sunrise, hikers start to swarm in pretty quickly.
Pro tip: You can also get a different view of this same arch from the Lower Delicate Arch trail. It sits across the canyon and provides a unique view of the Arch with a lot less people.
Double Arch Trail
Difficulty Level: Easy
Hiking Distance: 0.5 round trip
Elevation Gain: 95 feet
Due to its low elevation gain, and easy access right off the road, Double Arch is one of the most heavily trafficked trails in Arches National Park.
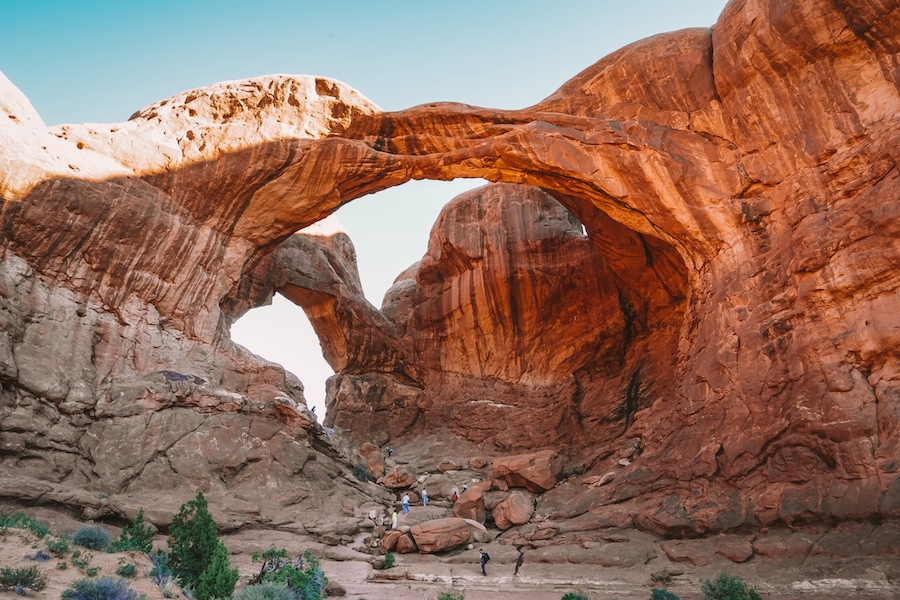
This arch formation is named after its two nearly identical arches that share the same base stone on either side. Double Arch was formed by water erosion flowing in from the top rather than the sides, leaving a beautiful, unique formation behind.
The view here is incredible, with the first arch serving as a window to the second. Plus this is the tallest and second widest arch in the park and you are actually able to climb up into it, so be prepared to feel the magnitude with this one!
Tower Arch
Difficulty Level: Easy/ Moderate
Hiking Distance: 2.4 miles round trip
Elevation Gain: 600 feet
Tower Arch is a lesser-known yet beloved hike that stands somewhat alone at the northwest end of Arches National Park.
Tucked away amongst the Klondike Bluff and Marching Men, Tower Arch feels like a bit of a secret as many visitors don’t make the trip to this corner of the park as it isn’t as concentrated with things to see (plus, you have to take a 45-minute drive down a gravel road). But that’s great news for those trying to escape the crowds.
In my personal opinion, this only adds to its charm and makes it one of the best hikes Arches National Park has to offer. If you’re seeking a little peace in nature as well as one hell of an arch view, this is a wonderful option. Standing underneath Tower Arch also offers some of the most beautiful, sweeping landscape views in the entire park!
Sand Dune Arch and Broken Arch Trail
Difficulty Level: Easy – Moderate
Hiking Distance: 1.7 miles round trip
Elevation Gain: 100 feet
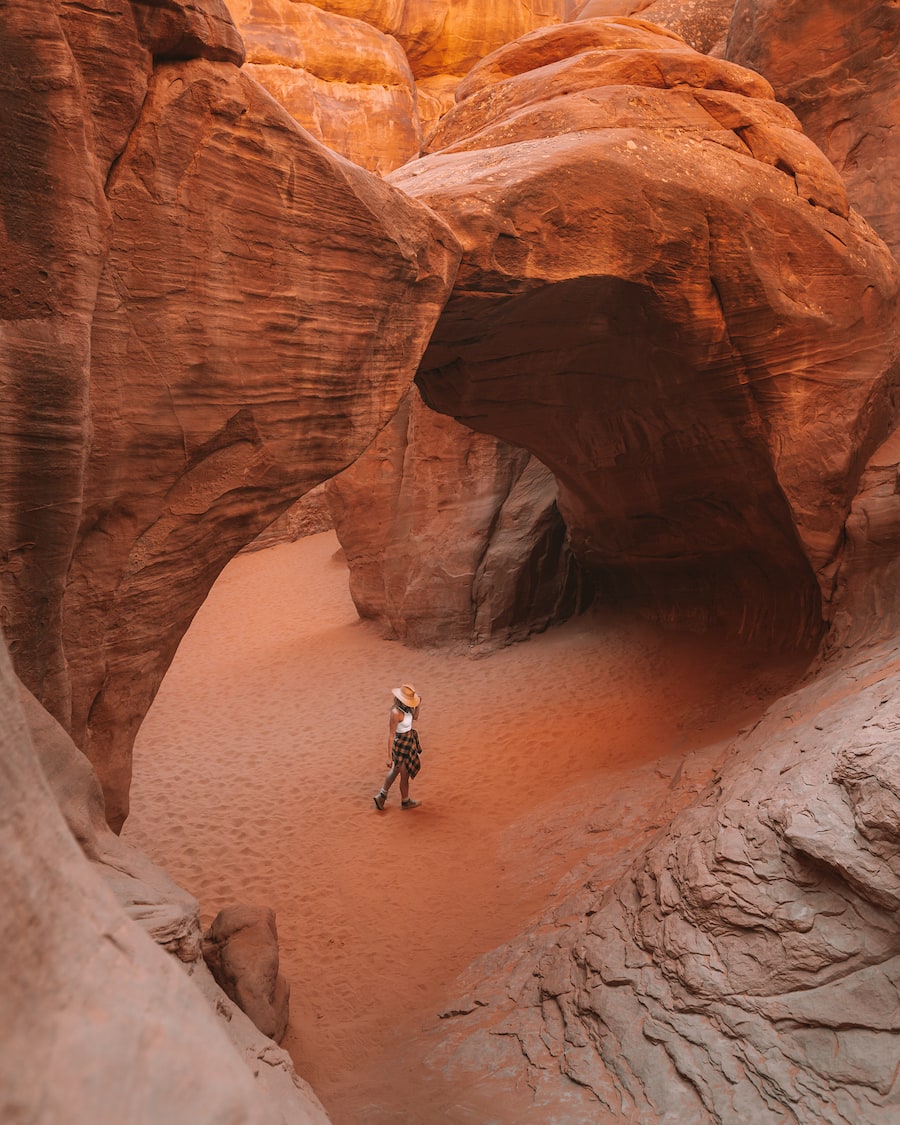
One of the coolest spots in Arches National Park has to be Sand Dune Arch. Since it is a mere 0.2 mile walk from the Broken Arch trailhead, calling this a “hike” is somewhat generous, but it’s a great one especially in the mid day heat as it’s mostly shaded.
This one is also a great option for families with children as it’s a short, low elevation walk with a variety of different formations to check out.
If you continue down Broken Arch Trail about 0.8 miles, you will find Broken Arch itself. Though the arch is not actually broken, it features a prominent crack-like fold in its center. It is definitely worth the walk for this unique sight as well as the beautiful vistas that can be seen in the surrounding landscape.
If you are planning on doing the entire 2.8 mile loop from Sand Dune Arch to Broken Arch, expect a more challenging hike.
Park Avenue Trail
Difficulty Level: Easy
Hiking Distance: 2 miles round trip
Elevation Gain: 300 feet
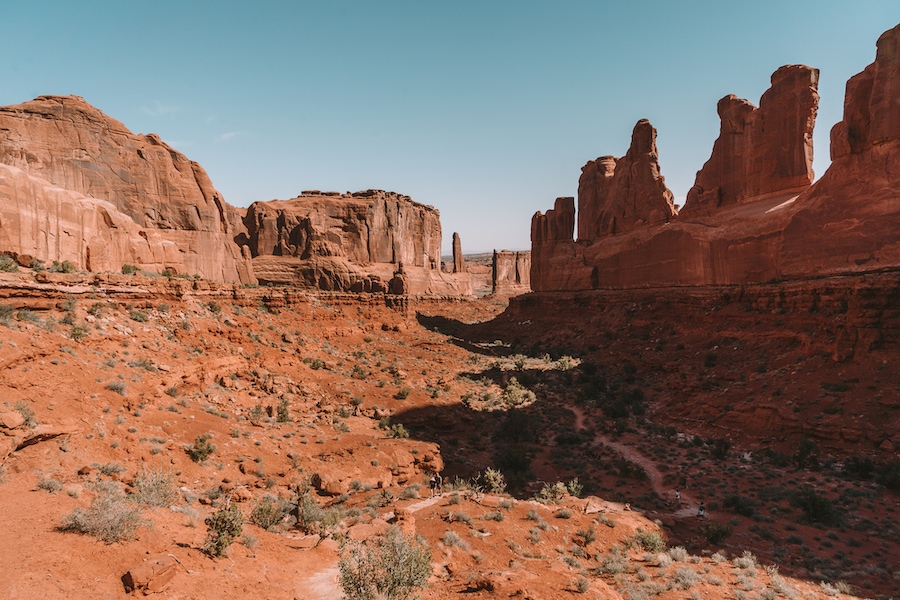
As you enter Arches National Park, the Park Avenue Trail is one of the first viewpoints you’ll find right off the main road. In addition to providing gorgeous panoramic views, the walk is also pretty easy. The trail leads you through a small canyon of stunning sandstone towers and unique monoliths.
This is another “hike” that is great for families as it is more of a leisurely walk and really introduces you to the park’s natural beauty and giant geological formations.
The colors and landscapes really stand out, making this one of the best hikes in Arches National Park. Some of the formations seen along the trail include Three Gossips, Courthouse Towers, The Organ, and the Tower of Babel.
Devil’s Garden Loop Trail
Difficulty Level: moderate/ difficult
Hiking Distance: 7.9 miles in total
Elevation Gain: up to 343 feet
This one is for the more ambitious hikers out there. Devil’s Garden Loop is hands down one of the best hikes in Arches National Park for anyone who loves an adventurous and somewhat challenging hike.
The distance alone sets it apart from the other hikes which is great for those looking to go the distance but also for those seeking a little solitude.
You will find most visitors aren’t looking for such a long, strenuous hike, and many will turn around after seeing the iconic Landscape Arch, leaving the remaining 7 miles for the more dedicated hikers.
Past Landscape Arch you will run into other stunners such as Double O Arch (not to be confused with Double Arch mentioned above), Navajo Arch, and Pine tree Arch, just to name a few. You will also be led along a primitive trail, meaning a little rock scrambling and some heights involved, but the added challenge is part of the experience and the fun.
It is not recommended to hike this part of the trail after rain or snow as the rocks can get a little slippery. Also, since it’s pretty long, be sure to bring tons of water!
Windows Loop
Difficulty Level: Easy
Hiking Distance: 1.2 miles round trip
Elevation Gain: 115 feet
Windows Loop is a well-traveled hike and one of the most popular in Arches National Park as it is relatively easy with multiple formations to stop and view along the way.
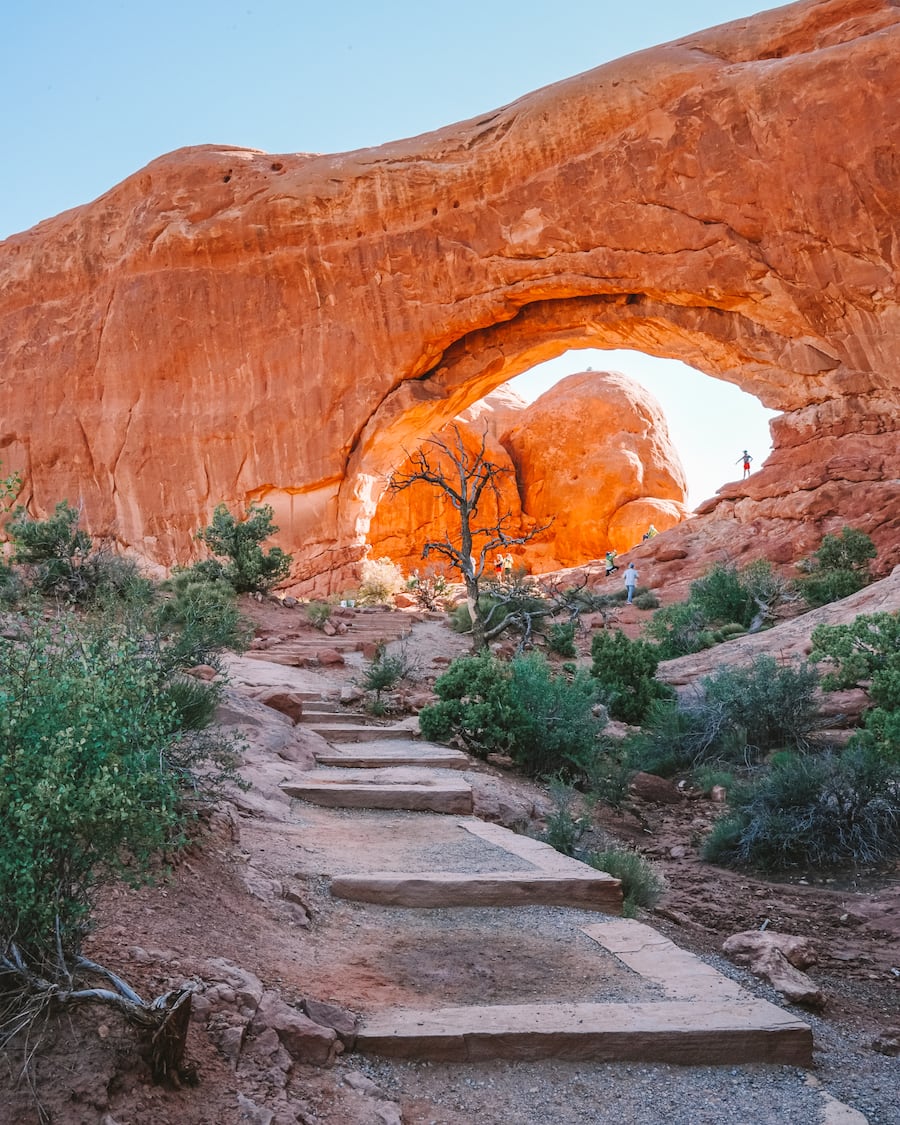
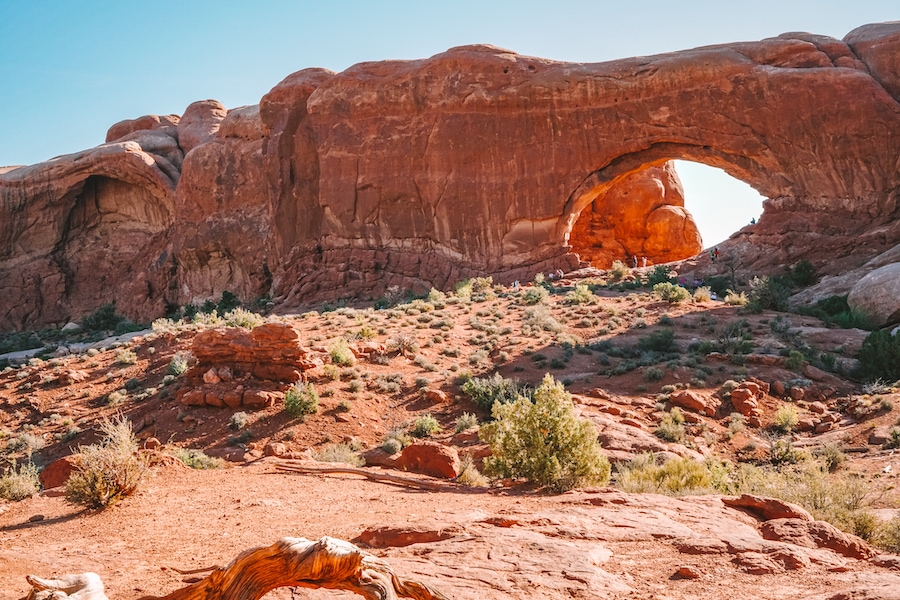
Before you even enter the loop, there are five formations you can check out which include Balanced Rock, Pothole Arch, Garden of Eden, Parade of Elephants, and Elephant Butte. About 0.2 miles into the trail, you will run into North Window, a large arch overlooking Dry Mesa and Dome Plateau to the northwest. You can walk directly into the “window” to take in the view.
As you head down the path, you’ll take a very short detour to get to Turret Arch, the smallest yet one of the most impressive arches on the hike. With a castle-like formation surrounding it, and a staircase leading right to the arch itself, this one is hard to miss.
On the way out you will pass by South Window, another beautiful window-like arch, except this one is inaccessible by foot and can only be admired from afar. With such a high concentration of arches and formations in one place, Windows Loop is easily one of the best hikes Arches National Park has to offer. Be sure to arrive early to grab a parking spot before they’re all gone!
Balanced Rock
Difficulty Level: Easy
Hiking Distance: 0.3 miles roundtrip
Elevation Gain: Less than 50 feet
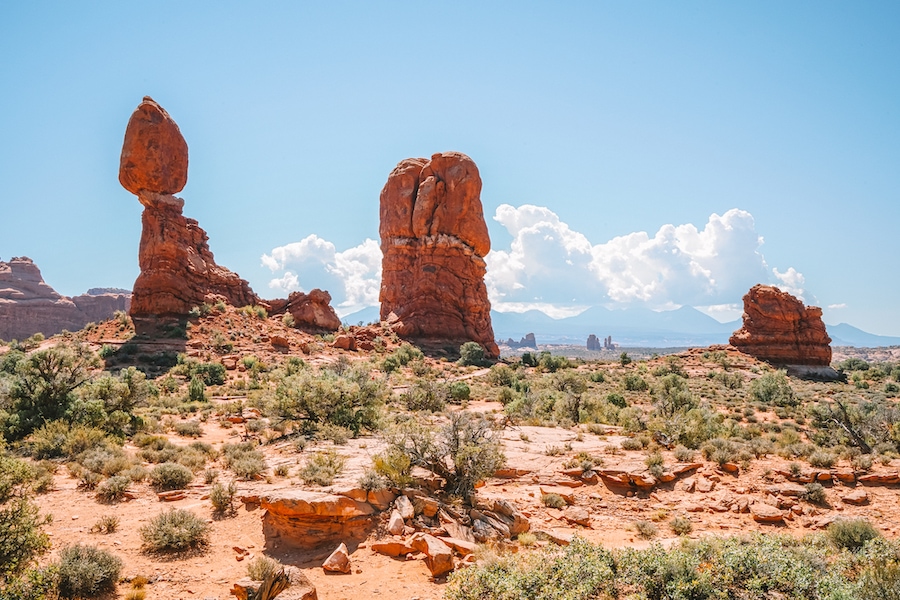
Balanced Rock is an iconic formation featuring one large rock seemingly balanced on the pillar rock beneath. The teetering giant is in fact attached to the stone beneath it, but the 128 foot structure sure does give off the illusion of a perfect balancing act.
Fun fact: it can be hard to tell from a distance, but the balanced rock on top is larger than three school buses!
As erosion continues to shape the landscape of Arches National Park, the boulder will eventually tumble, so be sure not to miss it on your next trip. This is a great stop before making your way to Windows Loop as they are in the same location.
This could also be a quick stop as it can be seen from the road, though it is worth getting a bit closer in my opinion.
Landscape Arch
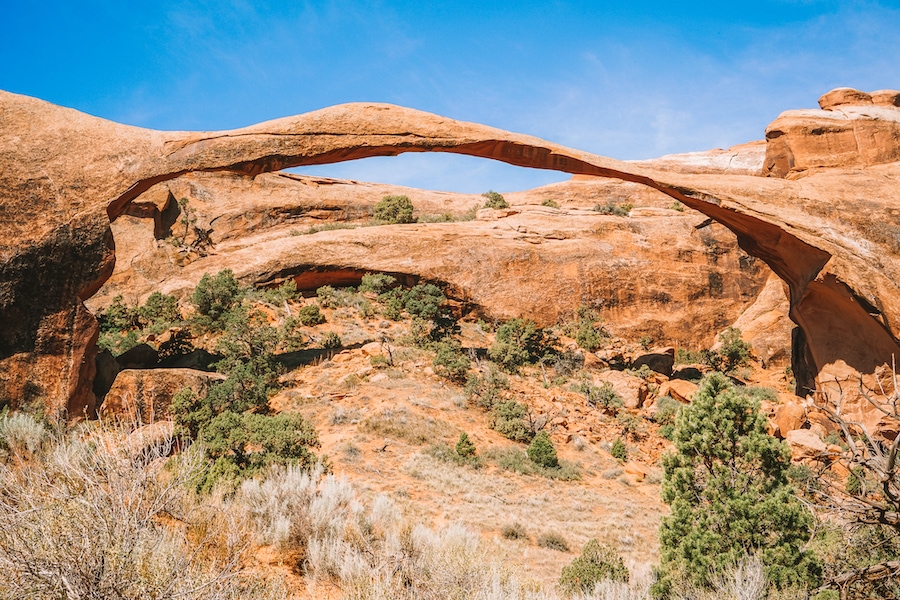
Difficulty Level: Easy
Hiking Distance: 1.8 miles round trip
Elevation Gain: 260 feet
After Delicate Arch, Landscape Arch is perhaps the most notable and documented of arches in the park. The longest natural stone arch in the world, Landscape Arch stretches 360 feet and is over 77 feet high. One of the most impressive features of the arch is its impossibly thin diameter.
Erosion has dwindled the arch down over the years and in 1991, a slab over 60 feet fell from the structure. The trail has since been altered and visitors are no longer able to stand underneath the formation, but everyone can still admire its beauty and wonder from afar.
To sum it up, here are the best hikes Arches National Park has to offer!
- Delicate Arch Trail
- Double Arch Trail
- Tower Arch
- Sand Dune Arch and Broken Arch Trail
- Park Avenue
- Devil’s Garden Loop Trail
- Windows Loop
- Balanced Rock
- Landscape Arch
Did this post inspire you to plan a trip to Arches National Park? Let me know in the comments below!
Planning a trip right now? Don’t miss my go-to websites for booking everything from flights and tours, to accommodation and more:
- Booking.com for the best hotel deals
- World Nomads for flexible travel insurance
- VRBO for awesome rentals
- Skyscanner for finding the best flight deals
- Hostelworld for budget accommodation
- Rentalcars.com for easy car rentals




No Comments